A few weekends ago, we actually had not a single plan on the calendar. You know what that means: PROJECT WEEKEND!!!! I tend to refer to us in this situation as weekend warriors. I got the urge to look up the Urban Dictionary definition of this and it cracked me up. This weekend of course, was an epic weekend! Here's Urban Dictionary's definition:
weekend warrior a person who holds a regular job during the week which restricts their ability to party/go on trips/partake in awesome activities, and thus plans epic weekend adventures to compensate. As much variation and quantity of awesomeness is packed into the weekends as physically possible, warranting the rest of the work week to recharge for the next weekend.
So yes, the hubby and I "partook in awesome activities with as much variation and quantity of awesomeness packed into our weekend as physically possible". Our standard Saturday morning routine includes letting the dog out, giving her breakfast, then laying in bed and discussing the plans for the day. I was totally stoked when Joe suggested the first project on the list. Here's a look at the projects we worked on and their story:
Kitchen Cabinet Update
Our house was built in 2000. The cabinet style in that day (not so long ago) included a piece of trim over the sink connecting the cabinets on both sides. I've always thought it looked a bit funny and I told hubby a while ago that I really didn't like it and the main reason was that I wanted a pendant light where the can light is above the kitchen sink. I was so excited to get this project going! Here's a picture of the kitchen before.

And here's the style I'm dreaming for: a pendant light, the spring curtain rod, rings holding the curtain....the cabinet color? not quite my thing. I'll stick with our oak.
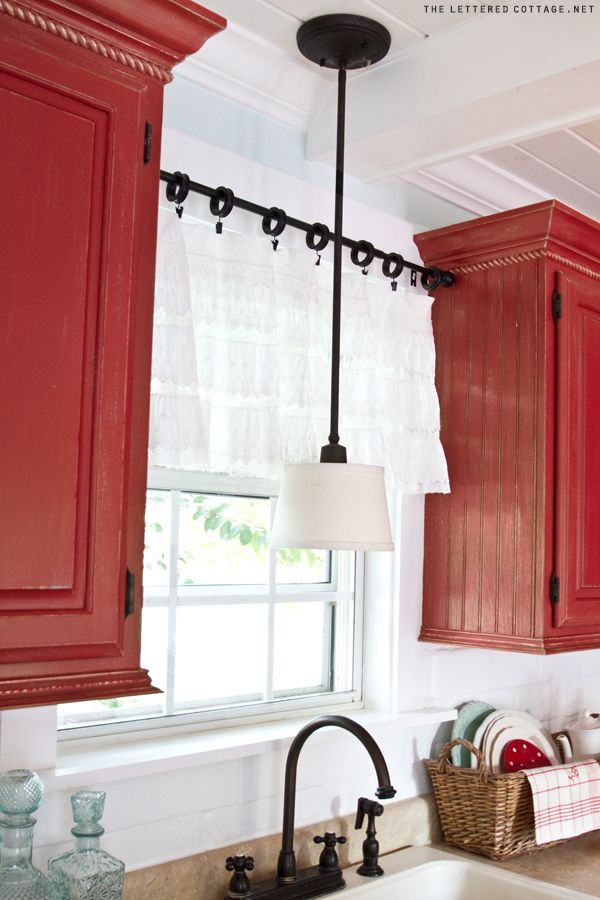 |
| Source |
Here's the steps we took:
1. Hubby used a small pry bar like this one to remove the long molding piece along the front of the cabinet and the piece placed below the molding.
2. We tried to remove as many of the old nails as possible. This was really difficult and we ended up just breaking them off and hammering it as flat as possible on the wood so there wasn't a gap when we placed the molding back up there.
3. We measured the length of molding needed on the sides of the cabinets and marked where that would be on the long molding piece. Hubby used his miter saw to cut the trim to the proper lengths. I must say figuring out the angle was a bit tricky, so be careful if you're trying this at home. It's definitely a measure 8x, cut once kinda thing.
4. Joe reattached the molding pieces and puttied any areas that will need sanded and re-stained.
5. Since Daisy HATES the compressor and the nail gun, we took a little trip to Lowe's to pick up a recessed can conversion pendant light kit to hang. During our trip to Lowe's I hit the jackpot. I know I just went for 1 thing, but I left with with two more projectss. When walking to the lighting section, I noticed on the clearance rack, a chrome 3-light vanity fixture (just like the one we've been looking for), and they were clearancing out a TON of fans (also, just what we've been looking for). So convenient right?
6. We hung the pendant light fixture kit and LOVE the final product. We've still got to match the stain to patch up some small spots, and update the curtain rod, but here's the almost finished project.


I made the curtain from some linen material. I'm posting the tutorial soon, so watch for it.
Here's the breakdown:
- Small Pry Bar: $0
- Measuring Tape: $0
- Miter Saw: $0
- Nail Gun (and compressor): $0
- Stain (from Lowe’s): $8 (Still needs to be done)
- Pendant Light Converter Kit (from Lowe’s): $30
- TOTAL: $38
Guest Bathroom Light Fixture
As discussed above, the coming about of this project was due to the trip to Lowe's to purchase the Pendant Light Converter Kit for above our Kitchen sink. We already replaced the cabinet pulls and the sink faucet, but couldn't really find a new light fixture to match the style. Here's the before and after of the fixture.


Here's the breakdown:
- 3-Light Vanity Fixture (from Lowe's): $40
Basement Fan
Again, this project sprouted from the Kitchen Cabinet update with the Pendant Light Converter Kit. The gold fan in the basement was really getting to me, especially after painting the room and rearranging the set-up. Here's the before and after in the room.


Here's the breakdown:
- Fan Fixture: $40
Entryway
I was totally inspired by Jenna Sue's entry way art and coat rack so I thought I'd come up with my own version. Her art work is wonderful. I love the geometric patterns and the simpleness of it.
 |
| Source |
I also really LOVE the idea of having knobs as coat hooks. I really was inspired by these drawer fronts used as coat hooks.
 |
| Source |
We've haven't finished the project yet, but we're about halfway there. We'll be finishing it up soon and revealing our entryway soon!
Kennedy's Baby Quilt
I started this baby quilt a few months before the baby was due. Before I was finished, a beauty came along. There is a precious little baby girl that is so adorable, Kennedy Caroline. She was born in July with some life threatening issues. She is such a fighter and is now doing very well. I was inspired to design a quilt from the breathtaking one below.
 |
| Source |
I designed my own pattern to be the perfect size for baby Kennedy. Over the weekend I finished quilting, then a few days ago I made the binding and completed the quilt.
I can't reveal it just yet. I have to make sure that Kennedy and her momma get it first. I'll post soon though.
I can't reveal it just yet. I have to make sure that Kennedy and her momma get it first. I'll post soon though.
I can't wait to see what this coming weekend has in store!
What projects are on your plate?


