Thursday, August 25, 2011

Roasted Banana Cupcakes with Honey-Cinnamon Frosting

I love bananas.  I don't eat them on a regular basis, but I just LOVE to bake with them.  The other day at the grocery store I scored a huge bag of about 12 "ripe" bananas for a whopping $0.99!!!  SCORE!!!


I had plans of making some delicious banana nut muffins just like OtisSpukmeyer's. 


Fast foward a few days to yesterday.  I got home from work, opened the door and the banana smell hit me in the face.  Oops, looks like they've sat a bit too long.  My first thought was to make the muffins or some bread loaves (my second banana baking favorite).  I totally changed my mind when I opened my cabinet full of cookbooks and saw Martha's Cupcake book and knew there just had to be something Banana in there.

As soon as I read through the recipe I thought to myself "Oh Martha, you've really done it this time!"

Roasted Banana Cupcakes with Honey-Cinnamon Frosting

Martha Stewart’s Roasted Banana Cupcakes

yield: ~16 cupcakes
Ingredients:
Batter
  • 3 ripe bananas, plus 1 to 2 more for garnish
  • 3/4 cup sugar
  • 2 cups cake flour (not self-rising), sifted
  • 3 large eggs, separated
  • 1/2 teaspoon baking soda
  • 1/2 cup sour cream1/2 teaspoon
  • baking powder
  • 1 teaspoon pure vanilla extract
  • 3/4 teaspoon salt
  • 1/2 cup (1 stick) unsalted butter, room temperature
Honey-Cinnamon Frosting
  • 2 1/2 cups confectioners’ sugar, sifted
  • 1/4 teaspoon ground cinnamon (I used more like 1/2 teaspoon)
  • 2 tablespoons honey
  • 1 cup (2 sticks) unsalted butter, room temperature


Process:
  1. Preheat oven to 400 degrees F. Line standard muffin tins with paper liners.
  2. Place 3 whole unpeeled bananas on a baking sheet and roast 15 minutes (the peels will darken).
  3. While bananas are roasting, sift together together cake flour, baking soda, baking powder and salt.
  4. Remove bananas from oven and let cool. Peel carefully into a medium-size bowl and mash.
  5. Reduce oven temperature to 350 degrees F.
  6. With an electric mixer on medium–high speed, cream butter and sugar until pale and fluffy (~5 minutes). Add egg yolks slowly, beating until each is incorporated and scraping down sides of bowl as needed.
  7. Add roasted bananas, beat to combine.
  8. Add flour mixture in three batches, alternating with two additions of sour cream, beating until just combined after each. Beat in vanilla.
  9. In another bowl, whisk egg whites to soft peaks.
  10. Fold 1/3 of whites into batter to lighten. Gently fold in remaining whites in two batches.
  11. Divide batter evenly among lined cups. Bake, rotating tins halfway through, until a cake tester inserted in centers comes out clean, about 20 minutes.
  12. Cool cupcakes completely on wire racks before frosting.
Frosting:
  1. Using an electric mixer, beat all ingredients until smooth. Feel free to add some extra honey or cinnamon to taste.
  2. Garnish with slices of banana (roasted or raw)

Yeah, I know what you're thinking, they are a lot of work.  Its true, they take quite a while.  But the roasted banana flavor makes them totally worth it!  One great thing about this recipe is that they can be frozen (unfrosted) up to 2 months or stored up to 3 days at room temperature. That is only if they last that long.  I know mine didn't!

Tuesday, August 9, 2011

Update: While I'm 25...

With only 4.5 months until my birthday, here's an update of my "list" (original post here):

- Lose 15 pounds
- Have a date with Joe that includes a picnic
- Bake a pie
        Lemon Meringue Pie from Lemon Meringue Pie Murder by Joanne Fluke – Made it at my mom’s the weekend I forgot my camera…oops. I’d never made one of these before and everyone who came to the bbq said it was wonderful! Yay me!
- Make homemade spaghetti sauce
Find a fantastic recipe for salsa and making it with veggies from my garden
        I made salsa just by throwing a bunch of stuff together.  I had about 2 cups peeled fresh tomatoes, ¼ cup chopped onion, 1 chopped jalapeno, 1 clove minced garlic, a little salt, and some fresh chopped cilantro.  It turned out fantastic!!  I can’t wait for more tomatoes to be ready!
- Bake a loaf of bread
- Visit a new city
         I just bought tickets to Louisville and Lexington in October to visit my bestie, Danielle.  Even though I’ve been there before to see family, I’ve never explored as a tourist.
Go to a concert
         Steel Magnolia – June 23
         The Band Perry – June 30
         Gloriana – July 7
         Randy Rogers Band with Reckless Kelly – July 14
         Corey Smith – July 28
         Kenny Chesney – July 30
- Run a 5K (and train for it first)
         Susan G. Komen Race for the Cure – August 14
- Make a menu for the week using my cookbooks, or at least Monday through Wednesday for the whole summer (Memorial Day through Labor Day)
         I’m doing a good job prepping for part of the week
- Write notes to friends
- Make homemade salad Dressing
- Blog at least 1x per week!
- Volunteer with an organization
         Susan G. Komen Race for the Cure Shirt Pick-Ups - August 9 & 12
- Go to church more
Go to a Sporting KC Soccer game at their new stadium (I'm not sure when construction is going to be completed though – Opened June 9)
         Hubby and I went July 23 with some friends from work.  It was crazy hot, like 100 degrees. We were trying not to move and photos slipped my mind, but the stadium was really awesome.  I hope we can go again this season.
- Attend a Play, Symphony, or Orchestra Concert
- Make a little "Welcome" spot for visitors to our house
- Host a dinner party (or a BBQ?)
- Read 2 books a month (any suggestions?)
         June:  The Help, Decision Points
         July: The Sweetness at the Bottom of the Pie…and ? (oops only 1 book!)
Plan a trip for "just the girls"
         Labor Day Weekend Trip with my Mom and Sister
- Get a pedicure with my mom
         Planning to do on the Girls Weekend Trip
- Make a fancy tiered cake (a reason isn't necessary)
- Tailgate at 6 Royals Games
         June 6 vs Toronto Blue Jays
         July 8 vs Detroit Tigers
         We better pick up the pace, season ends in September!
Ride a motorcycle

Friday, August 5, 2011

My 1st Quilt

If you know me at all you know that I love to sew!  I really enjoy spending time in my sewing room making something beautiful.  I've made many aprons for bridal showers, and some stuff around the house too.

Now that rush of our friends and family's weddings are over I decided it was time to learn to quilt so I could make some baby quilts.

A beautiful girl named Brooke Allison was the first youngster to come along. And there are more coming after, so I've got to get busy!

A friend of mine was making a baby quilt for her good friend who was preparing to have her first child also.  She'd made quilts before so I asked her many questions and she gave me this pattern from Quilt Taffy that she was using.  Quilt Taffy was even kind enough to provide a free printable pattern so go check it out. I thought it looked easy enough so that's what I made.


I attempted to embroider the baby's name on the quilt, but it didn't show up as much as I'd liked so I probably won't do that in the future.  I'm sure Brooke will enjoy this quilt for a long time.  Onto the next quilt. Any good starter pattern suggestions for other baby quilts?


Brooke
Photo courtesy of Brooke's mom, Melanie

Tuesday, August 2, 2011

Simple DIY: Guest Bedroom Full Length Mirror

My parents came to visit Hubby and I a few months after we moved into our house last summer.  With them, they brought boxes and boxes of stuff.  They called this stuff mine but I'm not entirely sure I'd seen any of the in the past 5 years {do I really need it then?}.   Hubby and I were still settling in so we just stashed them with lots of other boxes into our basement. FINALLY, about a year later I am finally getting around to going through this 'stuff'.  One of the first things I pulled out is my old full length mirror. 


Did you notice how the mirror is Red??  Well before it was Red it was Green.  Before it was Green, it was Gold.

When I was in high school, I started out my training to be crafty and creative when I was finally given free reign to decorate my room however I wanted.  I loved {and still love} the idea of using bright, bold colors for decorating. 

I had asked my parents for a few things for my room to decorate including a two-tone comforter in Pink and Orange similar to the one below from JC Penney.


I searched and searched the stores until I found the perfect turquoise valance for my small bedroom window.  My mom was gracious enough to make me some bright yellow curtains to replace the dark brown doors to my closet.  She also made me three different shaped pillows for my bed in Green, Yellow, and Blue.  The rose colored walls from a young girls childhood was replaced with a more mature white.  I took LOTS of time to create my own simple two-stripe border at the top in light blue and bright blue. I was also given permission, after much begging, to paint my light switch plate and outlet plates to be a bright green.  I also painted the frame of the mirror green as well as my entire bulletin board that hung above my desk. 

My parents eventually painted over the blue border in my old 'bright' room and switched it with what became the guest room when my sister got married and moved out.  During my 3rd year of college I received a co-op opportunity.  So I stayed at home for the fall semester and got some great experience working for a construction company.  I had previously lived in the Dorms then my sorority house at college and I was getting REALLY tired of seeing my original college bedding.  I decided once again that I would get new bedding and re-do a bit of the room that I'd be living in.  I went out and bought a Black Desk, a Black-White-and-Red bed-in-a-bag set, made black and red curtains to cover the old closet doors, and made a matching black and red valance.  This is when I noticed that the green mirror didn't quite fit.  So, I painted it red.  I do still miss the green a bit. 

So, we've lived in our house for 2+ years now.  The guest bedroom was almost the first thing that was 'done' as far as decorating and unpacking.  The only thing it was missing was a full length mirror.  I got out the spray paint, newspaper and tape and got to work.  Within a few hours I converted this mirror from something I'd grown up with to something our guests will be able to enjoy. 
After we finished spraying it, we used a razor blade to scrape off some of the green and red that I'd gotten on the glass part of the mirror. 

Oh look, here it is now in all it's glory!

Friday, July 29, 2011

State {of the} Art

Did you hear about the Pinterest Challenge that Katie over at Bower Power and a few others are doing? You MUST check out their video!  It made me laugh out loud for about 5 minutes. It's hilarious!

Pinterest State Art

I decided to take it on because currently, I have 196 pins! Check out my Pinterest.

It was pretty easy to pick my project and I had everything I needed for it. (Thanks to finding Meredith's comment about her tutorial here)

I was wondering around Pinterest the a while back, saw this and was totally inspired. Joe and I have been looking for something to hang in our master bedroom above our nightstands for about 6 months now.
I fell in love with this beautiful (and genius) art!

I knew it'll be perfect for our bedroom and we already have the paint to complete it. Meredith over at "Welcome to Heardmont" posted her tutorial and it's pretty awesome.

I made two State {of the} Art paintings, Illinois and Missouri. We both grew up in the same area back in Illinois and we also wanted to mark where our home is right now, in Missouri. I used the leftover paint from when we painted our recessed ceiling.  The color matches perfect with our bedspread.  I could really use some work on the curtains in this room, but that's for later.

Here's our room Before:
Master Bedroom Before Art

The art turned out awesome! Meredith's tutorial was so helpful and great to follow, and it only took me about 30 minutes to do both of them! Here's our version:


We opted not to not put any hearts on ours for now.  This might change in the future, but we'll see.  I love them so much as they are.  Here's a picture of them hung up.

Master Bedroom with Art

and then there were 9....(see my summer top 10 to-do list here.)

Linked at Bower Power's Pinterest Challenge Summer Edition and Hookin Up with HOH #60.

Wednesday, July 27, 2011

New Spice Rack

When we moved into our house we were greeted by a horribly ugly, homemade spice rack on the pantry door.  And man, am I talking ugly.  It had a sheet metal backing, 3 different woods, hot glue, and some type of expanding foam.  The guy who lived there before us seemed pretty smart and pretty equip with tools since we're assuming he installed the flooring in the basement and office, but this thing looked totally slapped together.  One day a few months ago one of the wood pieces holding the spices on the shelf started falling off.  Being down one shelf wasn't too bad since there was lots of space that we weren't using. That was until the entire thing started to come down.  YIKES!  I was too afraid that one day I'd come home to find all my spices on the floor of the pantry.  That didn't sound like too much fun to clean up so down it came. And I forgot to take before pictures, but it was kinda embarrassing.

Do you know how hard it is to find a hanging spice rack that's big enough and not too expensive?  But seriously, it was pretty hard.

We ended up going with the customizable White elfa Door system from The Container Store. The white matches the rest of the shelves in our pantry (secretly I would have loved the Platinum).  I love the different components we could choose to satisfy our needs.  We did spend quite a bit more than we'd originally planned, but the versatility and additional storage space was well worth it.  We now have more storage on the door than I'd imagined.  And when we want even more space, we can buy more baskets to add on.  This has been my favorite project so far!  It's something I see every day and it looks fantastic!


Now I just need to organize my pantry and probably re-paint it.

Monday, July 18, 2011

Summer Citrus Sparkles

I saw this recipe from Bakingdom a few weeks back and knew I just HAD to make them.  I'm a huge fan of citrus foods and drinks.  I just LOVE the way lemon and lime smell up the kitchen and the whole house! These citrus sparkles were a huge hit at a family gathering over the weekend.  I just know I'll be making them again before summer ends. This time we didn't use the glaze, but I know that next time it'll be a must. Enjoy!


Summer Citrus Sparkles 
Makes 2 dozen
Ingredients
FOR THE CITRUS SUGAR (excellent in tea!)
1/4 cup sugar
1/2 teaspoon finely grated lemon zest
1/2 teaspoon finely grated lime zest
FOR THE COOKIES
1 1/2 to 2 cups all-purpose flour
1/2 teaspoon baking soda (for vegan/dairy free, replace with 1 tablespoon corn starch)
1/4 teaspoon baking powder (for vegan/dairy free version, increase to 1/2 teaspoon)
1/4 teaspoon salt
1/2 cup (1 stick) unsalted butter, at room temperature (margarine for vegan/dairy free)
3/4 cup sugar
1 egg (for vegan/dairy free, replace with 3 tablespoons almond or soy milk)
1 1/2 teaspoons finely grated lemon zest
1 1/2 teaspoons finely grated lime zest
1 1/2 teaspoons fresh lemon juice
1 1/2 teaspoons fresh lime juice
1/2 teaspoon vanilla
To make the sugar: Combine the sugar and both zest in a small bowl until the zest is evenly distributed; set aside.
To make the cookies: In a small bowl, combine the flour, baking soda, baking powder, and salt; set aside.
In a large bowl, beat the butter and sugar together until light and fluffy. Add the egg and mix until combined, then stir in both zests and juices, as well as the vanilla. Once everything is combined, sprinkle half of the flour mixture over the top and gently mix in. Add the remaining flour mixture, mixing until no streaks of flour remain. If the dough is very sticky, add more flour, as needed, until the dough is barely tacky. Cover and refrigerate for at least 30 minutes.
Line baking sheet(s) with parchment paper or Silpat mats. Once the dough is chilled, preheat oven to 350 degrees. Roll one tablespoon portions of dough into balls. Roll each dough ball in the citrus sugar to coat it completely, then evenly space the cookies on the prepared baking sheet(s). Bake for 12 to 15 minutes, until the edges turn light golden brown. Allow the cookies to cool on the baking sheets for 2 minutes, then transfer them to a wire cooling rack. Cool completely before serving.
Glaze Variation (I prefer them this way, but there is more work involved)
FOR THE GLAZE
1/4 cup sugar
2 tablespoons fresh lime juice
2 tablespoons fresh lemon juice
Make the citrus sugar and the cookie dough the same way. **Do not roll the cookies in the sugar before baking.**
While the cookies are baking, combine the sugar and the juices in a small saucepan set over medium heat, bring to a simmer. Stir occasionally to dissolve the sugar and continue simmering until the mixture becomes syrupy.
Once the cookies have cooled for at least 5 minutes, generously brush the tops of the muffins with the citrus glaze. Once all of the cookies are glazed, dip each one into the citrus sugar, being sure to get them covered well.
Recipe by Darla

Friday, July 15, 2011

Summer's Top 10 To-Do List

I can't believe it's already halfway through July!  What happened!?!  I've not completed as much as I wanted to off my "House To-Do List".  Things seem to be getting added faster than things are being taken off.  That's just how it is, isn't it?

Almost a month ago, our city (more specifically, our neighborhood) was hit with tennis ball size hail.  Yeah, I said tennis balls.  As I stood in our dining room listening to the hail pelt our house, the only thing I could think was "We just have to sit here and take it. We can't make it stop."  So we now need a new roof, again.   We've lived in our house for 2 years and this will be the 2nd roof we've bought.  Not ideal.  I'd rather be spending that money on things inside such as new counters, new light fixtures, or new carpet.  Oh well, there's always next year.  

I have pretty high hopes for the rest of this year so here's my Summer's 2011 To-Do List:

1. Hanging Stemware Rack
Source
I've always wanted one of these and I think I've got the perfect place to put one in our kitchen.  I'm gonna look for the perfect one, otherwise I might try to build one.  Can you really call it building though, since it's so small?  Hmmm....

2. Blinds for the Bathroom
I really like these bamboo ones in the picture below. I hope I can find some similar for cheap.
Source

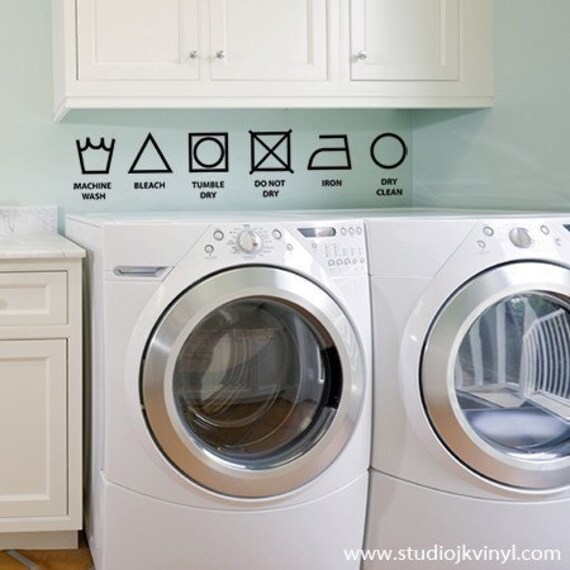
3. Re-Do the Laundry Room.
I've got this wonderful paint color from Glidden: Teal Lake for the walls.
I really wanna do a fun pattern, but might end up with some vertical stripes of another shade. I also discovered over at Pinterest that teal is a very popular laundry room color. That makes me happy since I love the color! I'd really love something adorable like this wall decor. I might have to some up with something along these lines since they're so freakin' cute!
Source

5. Dining Room Chair Pillows.
I'm convinced that the two lonely chairs that sit aside our buffet in the dining room need a little something to keep them company, like a pillow.  I'm not really sure how it's gonna work out, but I think it'll look good. We'll see. Here's something similar to what I'm looking for.  I'll probably go with rectangles though. 
Source

6. Organize Master Closet
I dream of it looking similar to this: (chandelier and all!) {btw, I just LOVE this blog}
Source

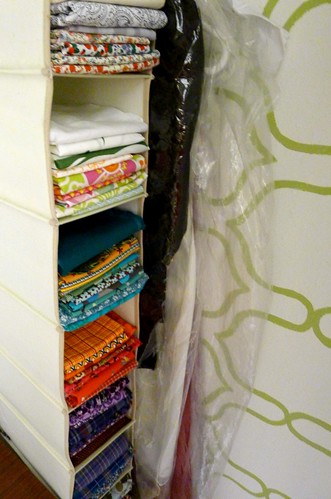
7. Fabric Storage
I've been looking for a great way to store my fabric so I can still see what I have.  I'd never thought of using shoe organizers.  I'm heading out this weekend to buy some and do this! (Did I mention I love Meredith's blog?).
Source
8. Ironing Board Makeover.
I'd love to give our ironing board a makeover.  Honestly it looks terrible and hideous.  Every time I use it I cringe, which has been happening a lot due to the hours I've been logging in my Sewing Studio. It's so bad I can't even put a picture up!

9. Bench in Bedroom
This in in progress, but I can't wait for there to be a place to sit in our bedroom as well as a place to store blankets, towels, etc.  This one is similar in style to the one hubby is working on.  It's stained to match our bedroom set. I'm trying to decide if I want a cushion on top or not.  
Source

10. State {of the} Art
This is the perfect project for above the nightstands in our bedroom.  I can't wait to get some painting action on.  I even found a tutorial over at Welcome to Heardmont {again, awesome blog}. Here's the link to her tutorial.
Source